16 November 2020
We finished the foyer, upstairs hallway, and stairwell!
Well, almost.
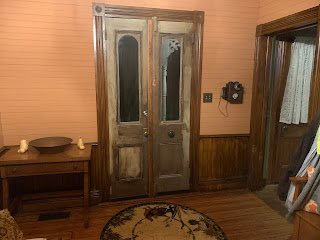
With the painting done and the floors refinished, the furniture and some art work return to the foyer. Amy hasn't refinished the doors yet because they are much easier to work on laying flat on some saw horses, and that will take some planning and cooperative weather.
The upstairs hall is also done. Amy recovered the fainting couch, did the curtains, and stained our classic 2x4 railing because the reality is that we don't know when we will find or fabricate a period railing (the almost done part).
Amy also refinished the stairs.
I have been tackling more mundane pursuits, like trying to weather seal our exterior doors. I have found it difficult to find a solution that I'd be happy with. Of course back in the day, there was no weatherstripping, but that's not really an option now.
One choice is formed tin strips attached to the door and the jamb that interleave with each other when the door is closed. This option requires a fair bit of modification to the door, and is problematic because none of our doors are really square in their jambs, and I also don't want to modify the doors so much.
For a while, bronze strips that had a slight crease in them were also used that were attached to the door jamb and would seal against the edge of the door. I rejected this approach because our exterior doors are all only 1-1/4" thick at best, and many of our door jambs actually consist partly of the interior door casing. This makes it problematic to attach anything to the jamb securely.
Another option, one that was on many of the doors when we bought the house, is a small aluminum strip with a round rubber seal on the edge. Personally I think these are very hard to install well, look cheap, and not in line with our vision of the house.
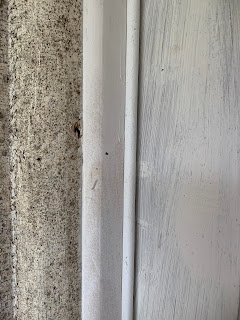
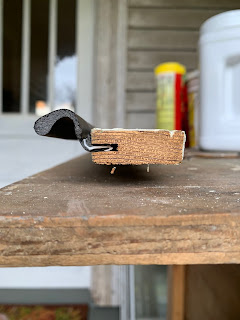
I eventually decided on modern vinyl door seals. On the doors where the original stop materials were missing or had rotted apart, I used a new door seal kit that has the stop material with the vinyl seals already in place. From right to left, the door, the vinyl seal, the new stop, and the original jamb.
On doors where we still have the original stop, I removed the stop, used our table saw to cut a slot in the back edge, installed the vinyl weather seal, then re-installed the stop.
I like this because it's not too new looking, seals the door well, and the vinyl strips are replaceable. Here's the two doors side by side.
We picked up a new to us bed frame a couple weeks ago for the Lilac room. After ordering a mattress, I got to work making a platform for it. Normally you would put some wood slats across the bottom of the frame and then put in a box spring, then mattress. But unless the sides are going to be exposed on a traditional bed frame, I think box springs are just big profit makers for the mattress companies.


The hall stairs look great. But then that all white grill just leaps out at me. Is there a way to make it less obvious?
ReplyDeleteWe couldn't agree more that the grill is a sore thumb. We'll probably paint it some how to make it have the look of wrought iron or something similar.
DeleteHow nice. I am a direct descendant of the Phillips and Fuller owners.
ReplyDeleteHow pleased we are to know that you have found, or are following our blog! If you're inclined, we'd love to talk with you to get more background information about the family, and whatever history of the house you might have. And of course, if you're ever out this direction, we would be disappointed if you didn't consider a visit.
DeleteNicely done - all! Is that ductwork in the wooden enclosure under the stairs (w the white vent)?
ReplyDeleteYes. We had to build out that area under the stairs to create a place to put the return air duct and vents for the first floor.
Delete