7 February 2018
First on the agenda is old business. This past Saturday we finally got the all the leaks fixed in the plumbing system. Testing it involves pressuring the system with air to about 100 psi. It's been holding steady for 5 days now. It took us five tries, finding a new leak each time. 4 of them were due to poor soldering work on my part. The fifth one was at the only threaded fitting in the system at the pressure gauge. With that, we're ready to call for our rough-in plumbing inspection. Huzzah!
I started working on the rough-in wiring, and soon went off on a few tangents. So it goes when working on old houses.
Tangent #1 - Putting back a wall where a wall used to be.
So before the main house and kitchen where joined together, there was an exterior wall at the back of the living room. At some point, I'm guessing mid 70's, that exterior wall was removed and some old barn beams were put in place to provide structure. At first, Amy and I were planning to leave this area open and either cover the barn beams or replace them with modern lumber (also covered). In either case, the plan was to structure it so we could remove the center post.

Through our contact with John Wood at the window workshop, we got in touch with Brett Sturm at the North Carolina State Historic Preservation Office. He arranged to stop by our house with an associate of his, Jeff Adolphsen, to look over our house and give us some guidance. We talked about insulating the house and heating the house. We also got some tips on our brick restoration work, and encouragement that we were headed in the right direction.
We also discussed preservation tax credits and getting listed on the Historic Register. Some of this discussion had to do with changes to the floor plan of the house. Based on this discussion, and thinking a little bit about traffic flow and furniture placement in the living room and dining room, and a rotted wood problem I was hoping very hard would go away by itself, Amy decided that it would be a good idea to put a wall back. I agreed. This also helped us feel a little better about having removed the wall between the kitchen and dining room. Since outlets and switches will need to be located in the new wall, this had to happen sooner rather than later.
The first task was to support the ceiling over the living room. I put a beam under the floor joists and held it in place with a couple of brackets made from scrap wood. Then Amy and I used a couple posts and jacks to raise the joists up enough to take the floor load off of the old barn beam

Then we used a third jack and post to take the weight of the beam off of the center post and pulled it out.

We used the same method to remove each of the side posts. I threw together some scaffolding to support each end of the beam once the old posts were removed.

To get the beam down, we alternated ends, lowering each end a foot or so at a time and supporting it with a piece of 2x4 until it was low enough for Amy and I to lift it and carry it away.

I'll admit, the beam was quite heavy. Amy and I had a couple of thrilling moments during this operation. We probably should have had at least one other person there to help us.

Tangent #2 - Rotted wood.
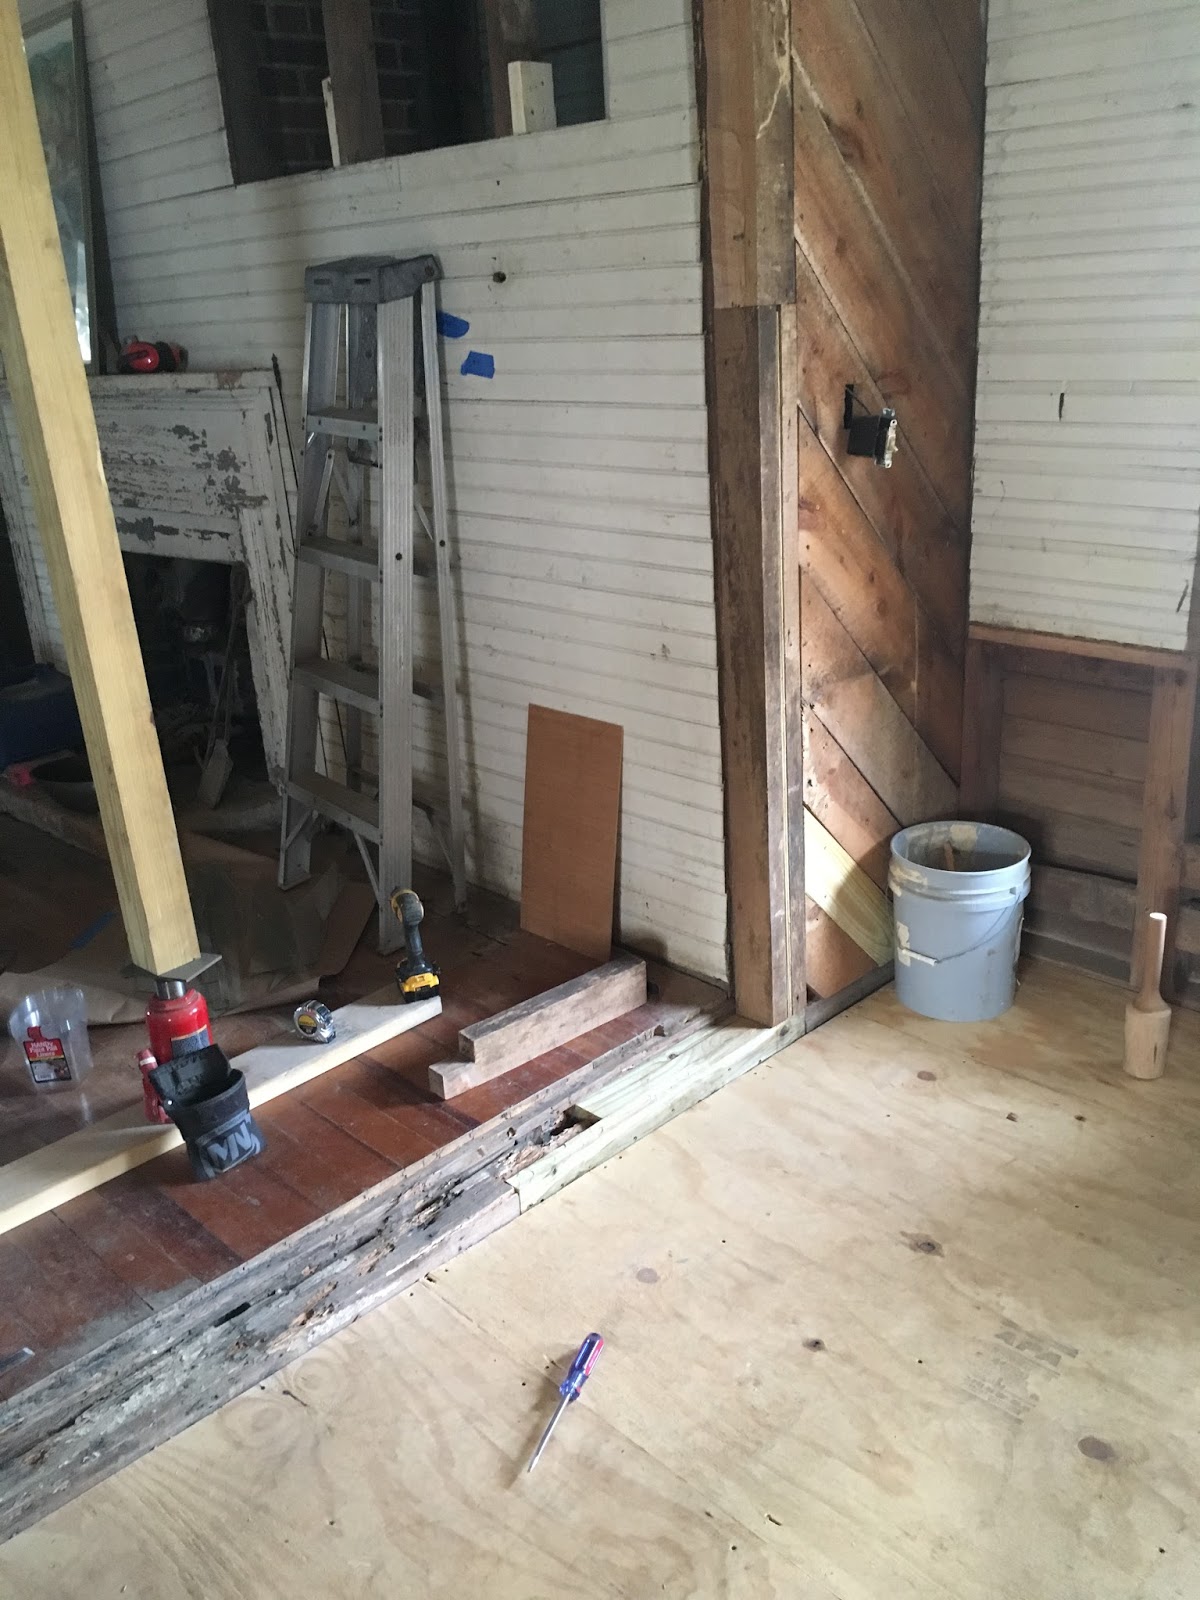
So the remaining structure at one corner of this opening wasn't doing so well. It had seen its share of water, insects and fungus, apparently. Of course it has to be fixed before building a new wall here.

I cut and chiseled as much of the rotted wood I could get to and scabbed in fresh lumber secured with liquid nails and screws. Whatever voids were left I filled later with epoxy resin.

Tangent #3 - The new wall.
Then we started reconstructing the wall. I fabricated a new beam to fit back in to the notches in the ceiling joists, added a new sole plate to help distribute the load on the existing sill beam, and put 4" wide studs back in.

We decided to put a 4' opening in the wall centered on the fire place at the far end of the kitchen.

Tangent #5 - The living room floor.
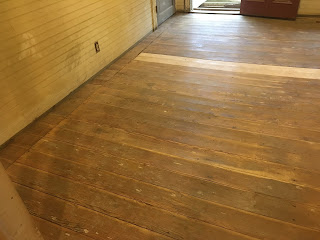
The living room floor stands out from the floors in the rooms around it because it's higher than the adjacent floors. The boards are not as wide. And they run parallel to the floor joists, perpendicular to the adjacent floors. After examining all the clues it was clear that a second layer of tongue and groove boards had been laid over the original floor. Here you can see a top layer of 3/4" T&G flooring running front to back over some 1" flooring running left to right.

During their visit, Jeff suggested that we take up the top layer of floor boards to see what was underneath. We decided that this was the best time to do it. We think the top layer of floor has been in place for at least 80 years. We will try to keep the new/old floor as intact as possible. Out come the pry bars again!

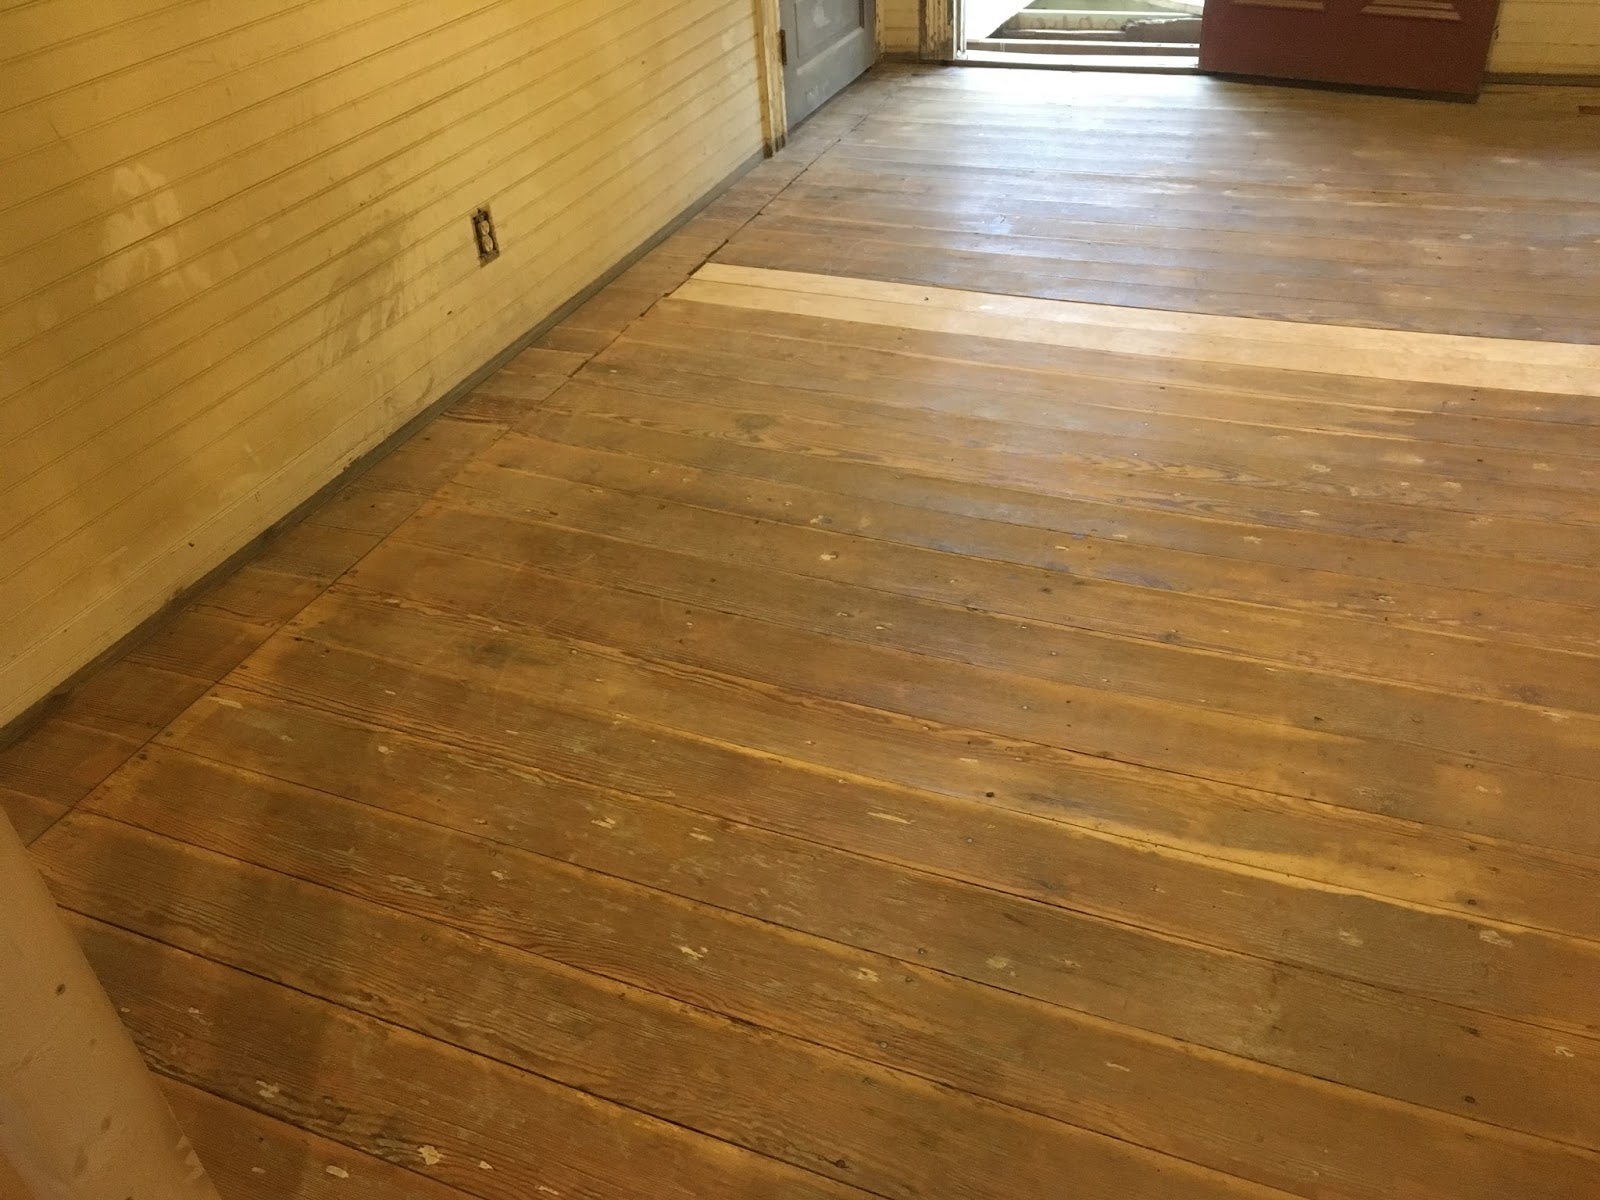
The original floor, circa 1850 appears to be in reasonable shape so far. It was painted gray.

With the whole floor exposed, we found that one board was missing, one board is damaged, and there is heavy traffic wear on certain areas of the floor.

We replaced two of the floor boards. A local lumber supply store has untreated 5/4 board made from southern yellow pine. I ripped it down to size and then used a router to create the tongue and groove edges. The biggest difference is that nearly all new lumber is flat sawn. All the old wood in the house is quarter sawn. Click here for a video that shows the difference.
Amy filled the smaller holes with stainable wood putty. We will sand the whole floor down to get rid of the paint and major defects and then refinish it with stain and some kind of oil finish. No polyurethane allowed!
Time to start on the electrical wiring?! No, not yet.
First on the agenda is old business. This past Saturday we finally got the all the leaks fixed in the plumbing system. Testing it involves pressuring the system with air to about 100 psi. It's been holding steady for 5 days now. It took us five tries, finding a new leak each time. 4 of them were due to poor soldering work on my part. The fifth one was at the only threaded fitting in the system at the pressure gauge. With that, we're ready to call for our rough-in plumbing inspection. Huzzah!
I started working on the rough-in wiring, and soon went off on a few tangents. So it goes when working on old houses.
Tangent #1 - Putting back a wall where a wall used to be.
So before the main house and kitchen where joined together, there was an exterior wall at the back of the living room. At some point, I'm guessing mid 70's, that exterior wall was removed and some old barn beams were put in place to provide structure. At first, Amy and I were planning to leave this area open and either cover the barn beams or replace them with modern lumber (also covered). In either case, the plan was to structure it so we could remove the center post.

Through our contact with John Wood at the window workshop, we got in touch with Brett Sturm at the North Carolina State Historic Preservation Office. He arranged to stop by our house with an associate of his, Jeff Adolphsen, to look over our house and give us some guidance. We talked about insulating the house and heating the house. We also got some tips on our brick restoration work, and encouragement that we were headed in the right direction.
We also discussed preservation tax credits and getting listed on the Historic Register. Some of this discussion had to do with changes to the floor plan of the house. Based on this discussion, and thinking a little bit about traffic flow and furniture placement in the living room and dining room, and a rotted wood problem I was hoping very hard would go away by itself, Amy decided that it would be a good idea to put a wall back. I agreed. This also helped us feel a little better about having removed the wall between the kitchen and dining room. Since outlets and switches will need to be located in the new wall, this had to happen sooner rather than later.
The first task was to support the ceiling over the living room. I put a beam under the floor joists and held it in place with a couple of brackets made from scrap wood. Then Amy and I used a couple posts and jacks to raise the joists up enough to take the floor load off of the old barn beam

Then we used a third jack and post to take the weight of the beam off of the center post and pulled it out.

We used the same method to remove each of the side posts. I threw together some scaffolding to support each end of the beam once the old posts were removed.

To get the beam down, we alternated ends, lowering each end a foot or so at a time and supporting it with a piece of 2x4 until it was low enough for Amy and I to lift it and carry it away.

I'll admit, the beam was quite heavy. Amy and I had a couple of thrilling moments during this operation. We probably should have had at least one other person there to help us.

Tangent #2 - Rotted wood.
So the remaining structure at one corner of this opening wasn't doing so well. It had seen its share of water, insects and fungus, apparently. Of course it has to be fixed before building a new wall here.

I cut and chiseled as much of the rotted wood I could get to and scabbed in fresh lumber secured with liquid nails and screws. Whatever voids were left I filled later with epoxy resin.
Tangent #3 - The new wall.
Then we started reconstructing the wall. I fabricated a new beam to fit back in to the notches in the ceiling joists, added a new sole plate to help distribute the load on the existing sill beam, and put 4" wide studs back in.

We decided to put a 4' opening in the wall centered on the fire place at the far end of the kitchen.

Tangent #5 - The living room floor.
The living room floor stands out from the floors in the rooms around it because it's higher than the adjacent floors. The boards are not as wide. And they run parallel to the floor joists, perpendicular to the adjacent floors. After examining all the clues it was clear that a second layer of tongue and groove boards had been laid over the original floor. Here you can see a top layer of 3/4" T&G flooring running front to back over some 1" flooring running left to right.

During their visit, Jeff suggested that we take up the top layer of floor boards to see what was underneath. We decided that this was the best time to do it. We think the top layer of floor has been in place for at least 80 years. We will try to keep the new/old floor as intact as possible. Out come the pry bars again!

The original floor, circa 1850 appears to be in reasonable shape so far. It was painted gray.

With the whole floor exposed, we found that one board was missing, one board is damaged, and there is heavy traffic wear on certain areas of the floor.

We replaced two of the floor boards. A local lumber supply store has untreated 5/4 board made from southern yellow pine. I ripped it down to size and then used a router to create the tongue and groove edges. The biggest difference is that nearly all new lumber is flat sawn. All the old wood in the house is quarter sawn. Click here for a video that shows the difference.
Amy filled the smaller holes with stainable wood putty. We will sand the whole floor down to get rid of the paint and major defects and then refinish it with stain and some kind of oil finish. No polyurethane allowed!
Time to start on the electrical wiring?! No, not yet.
Comments
Post a Comment