5 January 2017
Happy New Year! Time marches on, and so does the work on the house. Over the holidays, Amy's dad, Bob was visiting again and gave us a hand with taking up the porch flooring.

As Amy and Bob removed the boards, we revealed the cavalier, DIY approach to home remodeling. The wall with the two windows on the right was originally built about 2.5 feet back from where it is now. When they moved it out, they built it right on top of the existing porch floor without making any changes to the structure underneath. I suppose I can't make a huge deal about this since, after all, it's still standing today.

I also continued to work on the 70's kitchen floor covering. After half an hour of fighting with the plywood I stopped to think about how to make the process easier. Work smarter, not harder.

I eventually decided to divide and conquer. It had to be easier to pry up a small piece of plywood being held down with 10 to 15 nails than it was to pry up one large piece of plywood held down with 100+ nails. I grabbed my circular saw (depth set just shy of 1/4") and started hacking up the floor.

This worked really well. By late afternoon I had the whole floor removed.


One of the things that we plan to do is remove the wall between the kitchen and dining room. The wall consists of a built-in cabinet facing the dining room, a door, and another built-in facing the kitchen. After studying the wall carefully to make a game plan for how I was going to dismantle it, I decided that leaving the built-in on the dining room side in place might be a better idea.

Amy and I discussed it and decided to remove the other 2/3rds of the wall and see how things looked. I removed the base board and wainscoting on the dining room side. You can see in this picture where the left side dining room wall used to be. The floor boards change, and the original structure under the floor has held up a little better than the porch floor structure. They also simply added new bead board to the left of the wall break rather than reface the whole wall with full length pieces.

Removing the bead board went smoother than I was expecting because it was put up with cut nails. The nice thing about cut nails is that they're tapered. So once you get the nail to break loose, it comes out the rest of the way pretty easy. Round nails are the same diameter along their whole length, so they resist pulling until the very end. I was able to pry the tongue and groove planks slightly away from the wall, and then lift each plank up off of the one below it, separating the tongue and groove joint without damage.

I had to lay some plywood down to work because the floor here is very sketchy.

The kitchen side of the wall was covered with wider, plain tongue and groove planks. These also came off pretty easily. And finally I took the stud framing down.

After cleaning things up and seeing the space, Amy and I talked some more and figured out a tentative plan for how we will use these spaces. The built-in dining room cabinet will stay.

Up next is removing the floor boards to expose the floor structure and get easier access to the structural beams and foundation pillars. When originally constructed, the floor joists were set on ledger boards nailed to the beams. So I should be able to remove all of the joists without causing any problems. That's my plan anyway...
Happy New Year! Time marches on, and so does the work on the house. Over the holidays, Amy's dad, Bob was visiting again and gave us a hand with taking up the porch flooring.

As Amy and Bob removed the boards, we revealed the cavalier, DIY approach to home remodeling. The wall with the two windows on the right was originally built about 2.5 feet back from where it is now. When they moved it out, they built it right on top of the existing porch floor without making any changes to the structure underneath. I suppose I can't make a huge deal about this since, after all, it's still standing today.

I also continued to work on the 70's kitchen floor covering. After half an hour of fighting with the plywood I stopped to think about how to make the process easier. Work smarter, not harder.

I eventually decided to divide and conquer. It had to be easier to pry up a small piece of plywood being held down with 10 to 15 nails than it was to pry up one large piece of plywood held down with 100+ nails. I grabbed my circular saw (depth set just shy of 1/4") and started hacking up the floor.
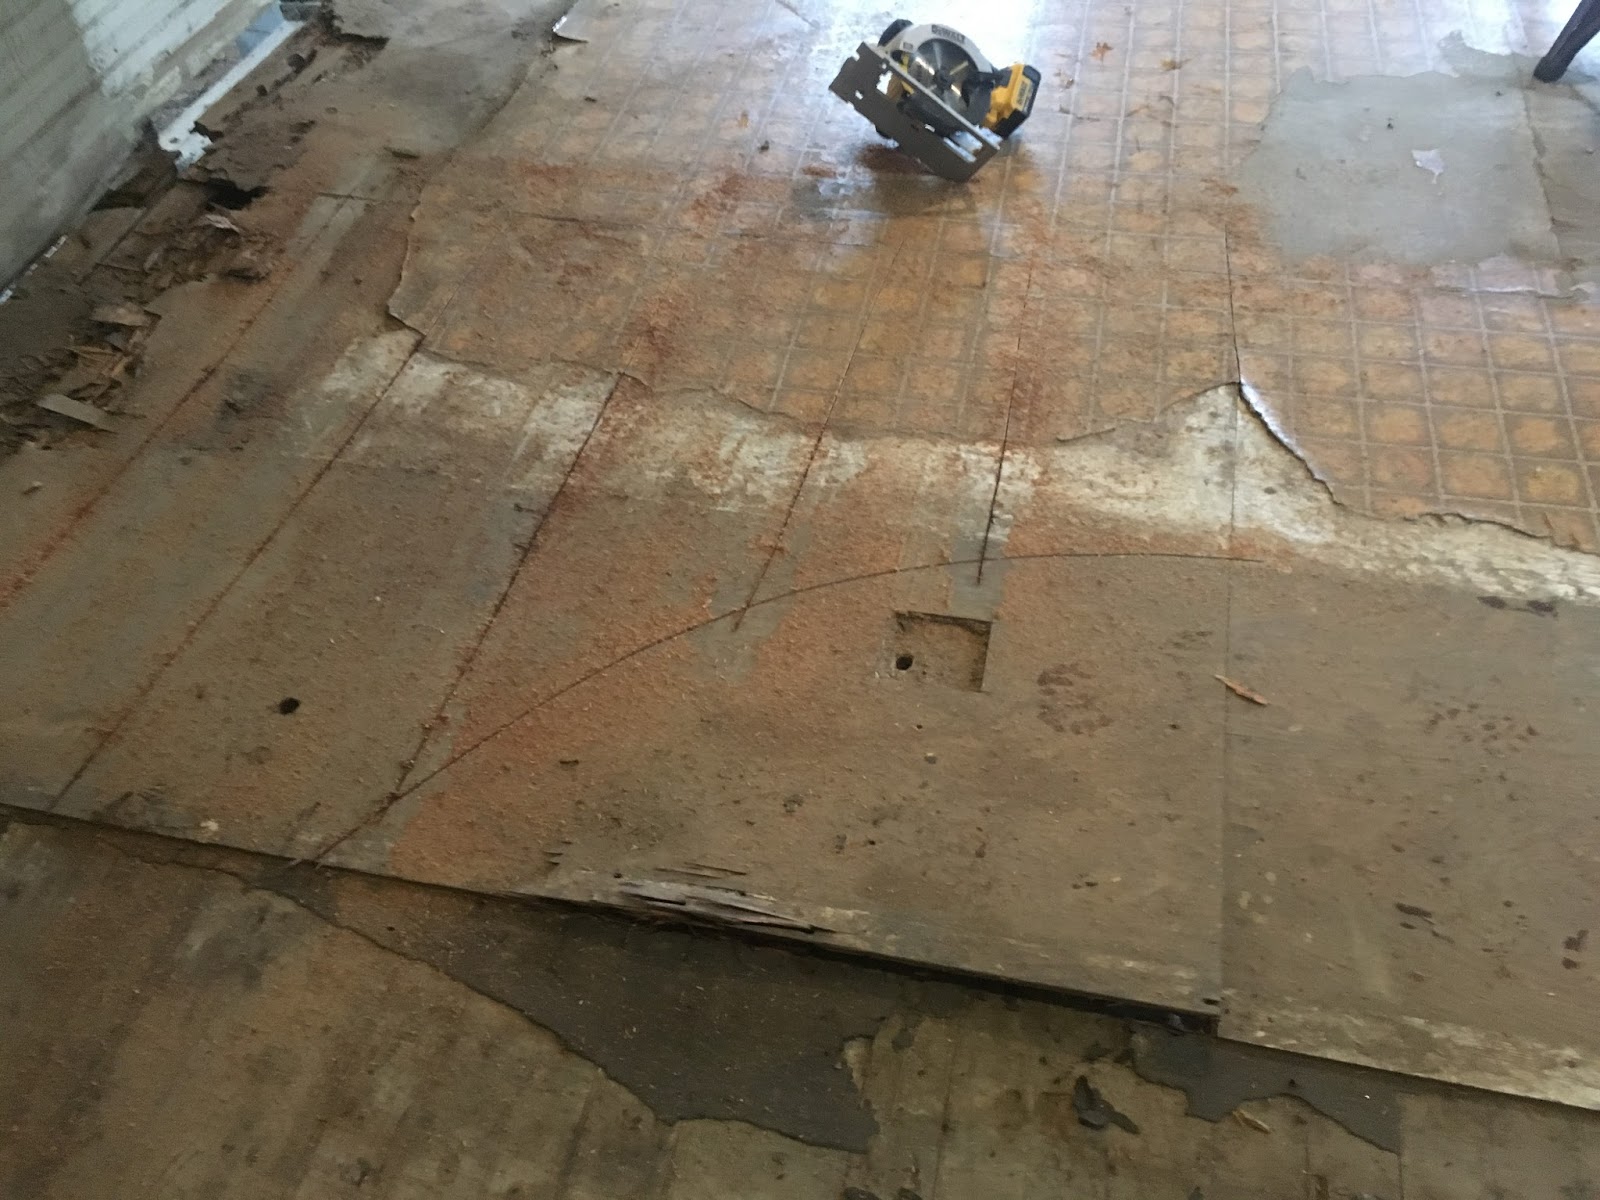
This worked really well. By late afternoon I had the whole floor removed.


The original floor is 1" thick tongue and groove. I think it's pine, but not sure. A number of random boards are damaged from insect action, along with larger areas that have suffered from water damage, in particular at the doors, and under what used to be the sink area which you can see in this photo, upper left.


Amy and I discussed it and decided to remove the other 2/3rds of the wall and see how things looked. I removed the base board and wainscoting on the dining room side. You can see in this picture where the left side dining room wall used to be. The floor boards change, and the original structure under the floor has held up a little better than the porch floor structure. They also simply added new bead board to the left of the wall break rather than reface the whole wall with full length pieces.

Removing the bead board went smoother than I was expecting because it was put up with cut nails. The nice thing about cut nails is that they're tapered. So once you get the nail to break loose, it comes out the rest of the way pretty easy. Round nails are the same diameter along their whole length, so they resist pulling until the very end. I was able to pry the tongue and groove planks slightly away from the wall, and then lift each plank up off of the one below it, separating the tongue and groove joint without damage.

I had to lay some plywood down to work because the floor here is very sketchy.

The kitchen side of the wall was covered with wider, plain tongue and groove planks. These also came off pretty easily. And finally I took the stud framing down.

After cleaning things up and seeing the space, Amy and I talked some more and figured out a tentative plan for how we will use these spaces. The built-in dining room cabinet will stay.

Up next is removing the floor boards to expose the floor structure and get easier access to the structural beams and foundation pillars. When originally constructed, the floor joists were set on ledger boards nailed to the beams. So I should be able to remove all of the joists without causing any problems. That's my plan anyway...
Comments
Post a Comment